


What Will I Learn?
What Is The X-Robots-Tag?
The X-Robots-Tag is an HTTP header directive used to control how search engines index and crawl a website’s content.
It enables directives like “noindex” or “nofollow” for non-HTML files such as PDFs or images, offering more granular control over search engine behavior.
The X-Robots-Tag works similarly to the meta robots tag. But there are a couple of big differences in how it applies.
Let me explain:
The X-Robots-Tag works for all files on a website (like images, PDFs, videos etc) and is set up on the website’s server.
The robots meta tag only works for individual web pages and is added inside the page’s HTML code.
The bottom line is this…
The X-Robots-Tag gives you more control over how search engines handle all your site’s content.
But it’s also a bit more complicated to set up.
✅ How to increase your traffic in 28 days. Click Here Now.
Why is the X-Robots-Tag important?
The X-Robots-Tag is important because it gives website owners more control over how search engines crawl and index non-HTML files and documents.
You can also apply directives on a site-wide level, meaning you have one directive that applies to specific file types on your site.
Let me give you an example:
Let’s say you have a PDF download as gated content. Users must put in their email address before accessing the PDF document.
You don’t want Google to index the PDF file and show it in the Google search results. That would defeat the purpose of making people opt-in to access it.
But a simple robots meta tag won’t help you because the PDF isn’t an HTML file.
That’s where the X-Robots-Tag can help.
You simply add the X-Robots-Tag to the page’s HTTP response and Google will know not to index the PDF file.
Quick and easy!
How To Check X-Robots-Tag?
The easiest way to check for an X-Robots-Tag is by using the Ahrefs free Chrome extension.
Install the Ahrefs Chrome extension and load the URL you want to inspect.
Then, click on “Indexability” and under Robots, look for X-Robots-Tag HTTP.
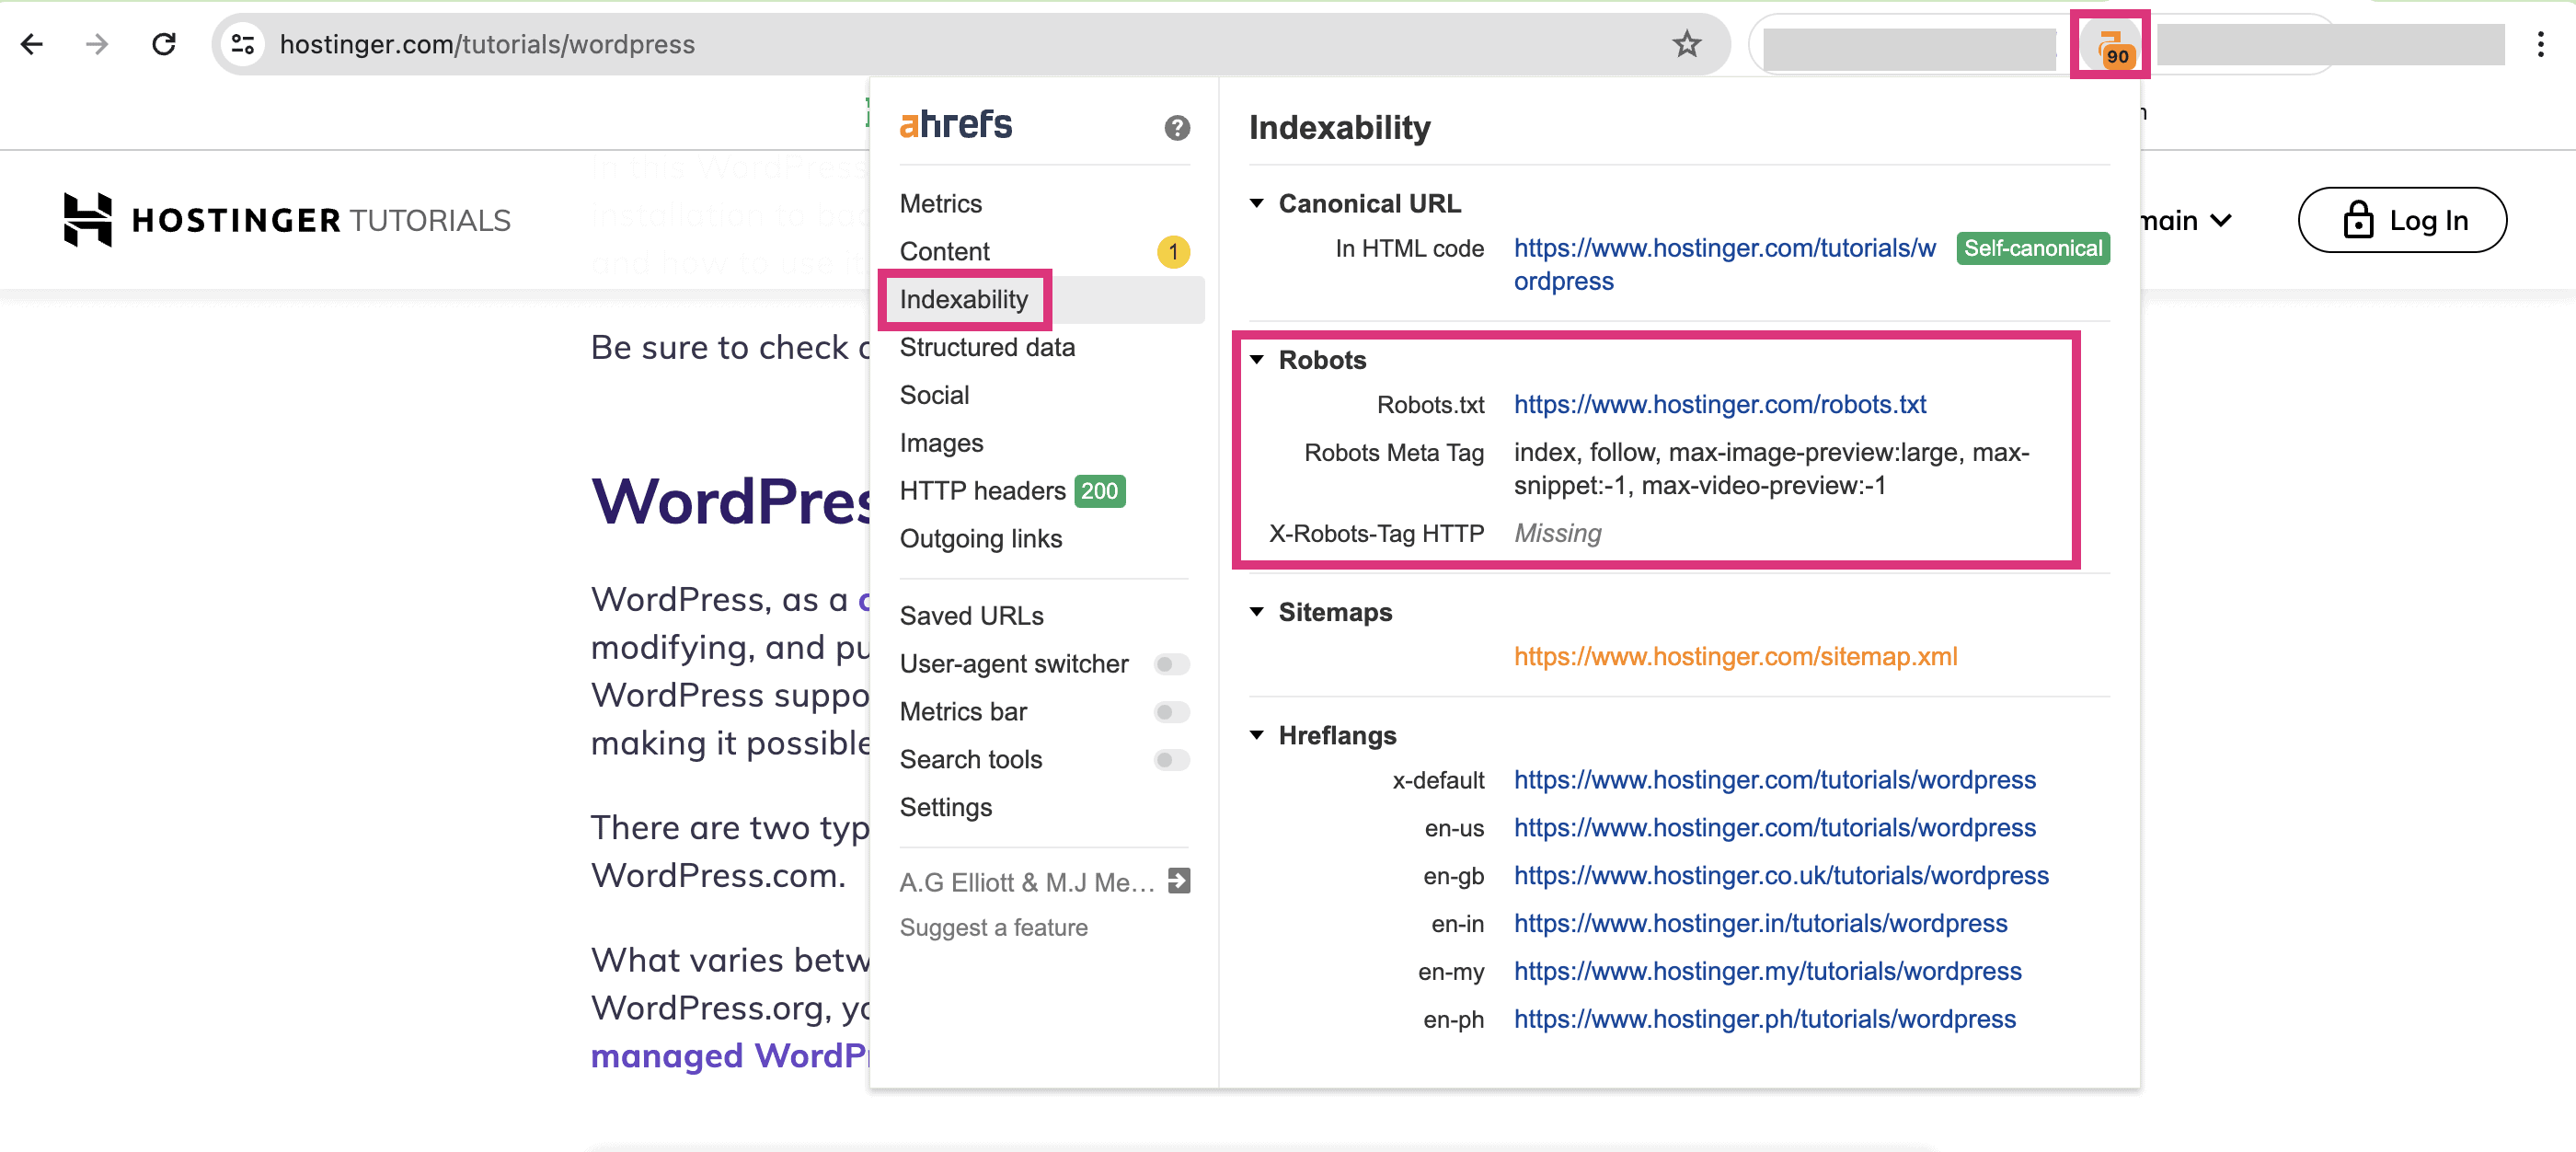
This will quickly tell you if an X-Robots-Tag directive is on the page.
What Directives Can Be Used In An X-Robots-Tag?
Here’s a list of the most common directives that can be used in an x-robots-tag:
- noindex: Tells search engines not to include the page in search results.
- nofollow: Instructs search engines not to follow the links on the page.
- none: Combines noindex and nofollow directives.
- noarchive: Prevents search engines from storing a cached copy of the page.
- nosnippet: Disallows search engines from displaying a text snippet or video preview in the search results.
- noodp: Blocks search engines from using metadata from the Open Directory Project (no longer relevant as the ODP is defunct).
- notranslate: Advises search engines not to offer translation for this page in search results.
- noimageindex: Prevents search engines from indexing images on the page.
- unavailable_after: Specifies a date/time after which the page should not be shown in search results.
- max-snippet:-1: Sets no limit for the length of snippets shown in search results.
- max-video-preview:-1: Allows an unlimited length of video previews.
- max-image-preview:large: Enables large image previews in search results.
- all: Allows all actions – indexing and following of links.
As you can see many of the x-robot-tag directives are very specific.
You can control individual elements on a page and even stop content from being indexed after a certain period of time.
This is why the x-robots-tag is an essential tool for any website owner.
How To Setup An X-Robots-Tag
To set up an X-Robots-Tag you need to configure your web server to add the tag in the HTTP header for the specific file.
- On Apache: add the x-robots tag through the .htaccess file or httpd.conf file.
- On NGINX: add the x-robots-tag on the website’s .conf file.
Keep in mind that adding an x-robots-tag to your site will take a little bit of technical knowledge.
Here are more detailed steps:
Apache
Locate the .htaccess file in your website’s root folder and open it with a plain text editor like Notepad.
Add the X-Robots-Tag directive which should look similar to the following example:
<FilesMatch “.(pdf)$”>
Header set X-Robots-Tag “noindex, nofollow”
</FilesMatch>
In this example, the tag applies the noindex and nofollow directive to PDF files. Simply add more directives by separating them with a comma.
Save your changes and restart Apache to apply them using the following command:
sudo service apache2 restart
Nginx
Find and open the nginx.conf file with a text editor.
Add the following add_header directive within a location block.
For example:
location ~* .(pdf)$ {
add_header X-Robots-Tag “noindex, nofollow”;
}
This sets the X-Robots-Tag to noindex and nofollow directive to PDF files.
Now save your changes and reload the Nginx to active them:
sudo service nginx reload
Remember: Always back up configuration files before making changes.
You should also carefully test before applying new directives to ensure they are working properly.
✅ How to increase your traffic in 28 days. Click Here Now.